Friday, 18 March 2011
Thursday, 17 March 2011
Magazines that inspired features in my magazine
Costume Makeup Props and Accessories
COSTUME
I thought of ideas of costumes that the models for the magazine may wear and this is a moodboard/collage of what some of those may be I opted for a more relaxed laidback and stylish look that teenagers will relate with I put single pictures together to make a couple of good looks for the magazine I will call 'VOLUME'.Athough the outfits shown hear are the female versions of them for the male models they will wear the male versions of the costumes displayed in the collage/moodboard.
MAKE UP.PROPS.ACCESSORIES
For the next section I thought of the type of makeup that the models for the magazine would wear and hear are the things I came up with apart from make up I thought of props and accessories that may be useful.
Tuesday, 15 March 2011
Using an apple mac
I was a PC user beforeI started this project and during the course of the project I begun to use a mac and certain things were different with a mac there is no right click and therefore those feautures like copy and paste etc. To do that on a mac to copy I would have to click cmd c and to paste I would have to click cmd v.
On the Mac however if you are using photoshop you cant use the comands either to copy and paste. you would have to duplicate the layer and then do what you want to do.
So to know how to do certain things I would be able to on PC but couldn't do the same way on the Mac I looked for tutorials on youtube here ae two of those I looked at which I found helpful.
Using Photoshop 2
This enabled me to play about with text for my magazine as I felt the text options available on photoshop isn't as modern apart from this I got some text from dafont.com
The lasso tool
I also found that using a lasso tool is useful and allows you to effectively select and move certain areas of an image etc.
Using photoshop
As a beginner of photoshop I relied on many tutorials to do certain things as well as teacher's assistance.
• to remove unwanted parts of an image;
• to rotate an image;
• and to expand the canvas area.
A simple crop
With a new image, one of the first things we are all likely to do is remove an unwanted rebate, and we did that with the alarm clock image.
The image used in this Photo shop tutorial is number 09.jpg in the Samples-Starting folder. It can be downloaded by clicking here or you can use one of your own images.
To summarize the procedure:

Rotate
 To enable us to rotate the image with the Crop Tool we first need to expand the area around the image.
Expanding the canvas size
The whole image can be made bigger with the Crop Tool.


Effects can be put on text, all sorts of techniques can be applied, justification is available and type modified in other programmes can
be imported.
Properly handled, type is revitalized and turned into unique Photoshop fonts.
Making Photoshop shapes and designs can be a very creative process.
This page starts off with the most basic of shapes and will expand to more adventurous designs, which will lead to unlimited scope.


Information obtained from - http://www.photoshop-tutorials-plus.com/crop-tool.html
Using the Crop Tool
The Crop Tool has several uses:• to remove unwanted parts of an image;
• to rotate an image;
• and to expand the canvas area.
A simple crop
With a new image, one of the first things we are all likely to do is remove an unwanted rebate, and we did that with the alarm clock image.
The image used in this Photo shop tutorial is number 09.jpg in the Samples-Starting folder. It can be downloaded by clicking here or you can use one of your own images.
To summarize the procedure:

- Select the Crop Tool.

- Position the cursor in a top corner and drag it diagonally across the image.
- Drag one of the small square handles on one of the sides into the picture to crop out the unwanted edge.
- All four sides can be treated individually.
- To adjust a vertical and horizontal side at the same time, move a corner handle into the picture.
- Moving a corner handle into the picture while holding Shift will keep the cropping in proportion.
- To adjust two opposite sides in equally, hold Alt and move one of the side handles into the picture.
- Press Enter / Return to apply the crop.
Rotate
 To enable us to rotate the image with the Crop Tool we first need to expand the area around the image.
 - Drag the bottom right corner of the image frame down and to the right to increase the grey area around the image.
- Select the Crop Tool from the toolbox.
Pressing C is a shortcut to this. - Drag the cursor across the image as before.
- Place the cursor beside the image and it changes into a double curved arrow symbol.
Dragging the cursor will rotate the image.
The image will rotate in the preview to show you how it will look.
A very high resolution image will take some moments if the computer is not too powerful.

Expanding the canvas size
The whole image can be made bigger with the Crop Tool.

- Have the toolbox colours for foreground and background set to default, with black over white. Use the letters D and X to achieve this.
- Drag the bottom right corner of the image border down and to the right to put more grey area around the image.
- Drag the Crop Tool across the whole image.
The image is surrounded by what is known as the bounding box. - Place the cursor on the bottom right corner angle and drag it down and to
the right.
The four sides can be moved out individually if required. - To increase the canvas area symmetrically around the image hold Shift + Alt as you drag out a corner handle.
- Press Enter / Return.
The new extra area will take on the colour of the background colour square in the toolbox, which in this case will be white. - This is the situation when the image is flattened and locked.
For the new area to be clear, the image must be unlocked and changed to a normal layer.
The flattend image will be called Background in the Layers palette.
To unlock it, hold Alt and double-click on the Background name in the Layers palette.

- Now drag the bottom right corner down and out as before.
- Drag the Crop Tool across the whole image and while holding Shift + Alt move the bottom right corner handle of the crop bounding box down and to the right.
Press Enter or Return. The new area around the image is clear.
With a new layer placed under the image,
it can be filled with another image or colour.
Putting Special Effects on Text
There is tremendous scope for creative use of text in Photoshop.Effects can be put on text, all sorts of techniques can be applied, justification is available and type modified in other programmes can
be imported.
Properly handled, type is revitalized and turned into unique Photoshop fonts.
- Create a new file by going to File > New.
Enter a Width of 4" or 10cm; a Height of 2" or 5 cm;
Background: White. OK. - Have the foreground and background colours on default of black on white
(press D and X). - Press F7 to bring up the Layers palette.
- Select the Type Tool in the toolbox.
In the options bar, use the settings shown.
- Click on the new background and type in the words 'Quickly NOW'.
The foreground colour of black will be used on the type. Any colour can be chosen as the foreground colour before starting to type. When the cursor is over the type, it changes to the Text cursor symbol; when the cursor is away from the text, it reverts back to the normal Move tool symbol and the text can be moved around the screen.
Position the text centrally.
- To change the colour of the text now, select the text and in the options bar, click on the black colour patch to bring up the Color Picker. Choose a red. OK.
- Go to Layers > Layer Style > Blending Options. BIG isn't it? Another one of Photoshop's large dialogue boxes. The only way to make them smaller is to increase the screen resolution of the monitor through Control Panels. With versions of Photoshop older than CS, a text layer must be converted to a regular layer first.
In such cases, go to Layer > Rasterize > Type, then go to Blending Options via the small arrow in the top right corner of the Layers palette.
- Under Styles, click on the Drop Shadow name, which brings up the
Drop Shadow options. Try these settings:
Adjust the Angle to 130º
Distance to 18
Spread to 7
Size to 5.
Then try other settings to see the difference they make.
- Check the Inner Shadow box on the left then click on the Inner Shadow name to bring its individual adjustment box on to the screen.
Adjust Angle, Distance, Size and Choke to see what difference they make.
Effects do vary with different size and thickness of letters.
Whatever Angle is set, it applies to all the different effects. Angle cannot be set individually.
Making Photoshop Shapes and Designs
Making Photoshop shapes and designs can be a very creative process.
This page starts off with the most basic of shapes and will expand to more adventurous designs, which will lead to unlimited scope.


Information obtained from - http://www.photoshop-tutorials-plus.com/crop-tool.html
Sunday, 13 March 2011
Design drafts
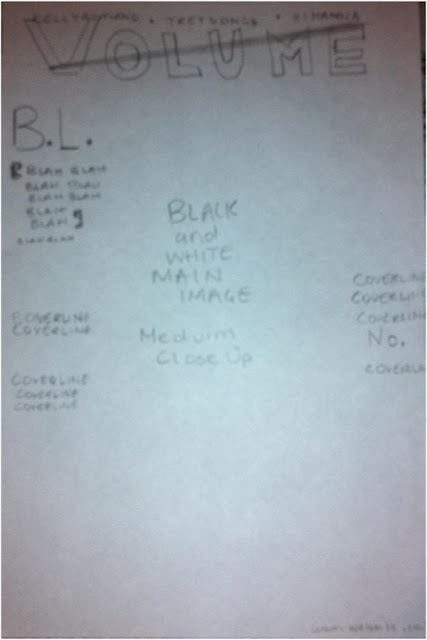
This is a one draft of my front cover.
This is another draft of my front cover.
This is a last draft of my front cover.
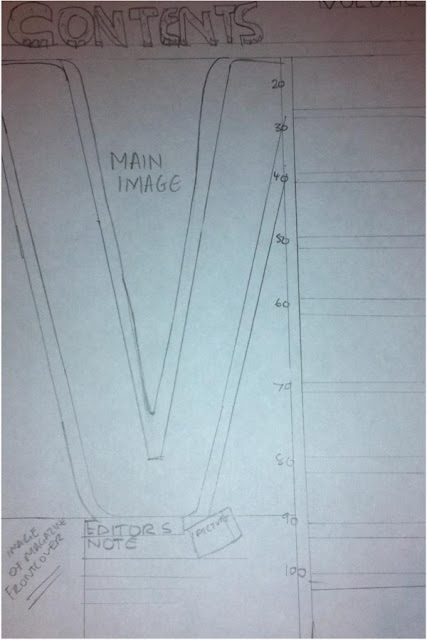
This is a draft of contents page.
This is another draft of the contents page.
This is the double page spread draft.
Subscribe to:
Comments (Atom)


